


I have been rather interested in finding out how emulators work and maybe, how to contribute to emulator development. Totally not because I’m too poor and lazy to actually play games on actual hardware.
Following the CHIP-8 tutorial, I wanted to make a project to improve my emulator development skills, and that is unique (best if it is not done a million times before). I discovered Sunplus, which is a series of chips used in some bootleg game consoles like the Chintendo Vii, VSmile, and Plug and Play Games. Perfect!!
So today, instead of making an actual emulator for Sunplus, I’ll show you my journey of porting native code for an emulator into an Android app!
How Emulators Work
Even though we aren’t making an actual app, we still need to understand how emulators work.
The oversimplified idea of an emulator is that it
- Takes in a binary file (in machine language)
- Read in machine language instruction one at a time
- Simulates what the instruction is supposed to do (For example, for the add instruction, it adds 2 numbers)
To learn more, you could start with the CHIP-8 Emulator Tutorial, and then find an NES/Gameboy Emulator Tutorial.
What is Ported?
Instead of coding the emulator in Java (I have laziness), I decided to just yet unununium, an open-source Sunplus Emulator that is proven to mostly work. MAME also has a Sunplus emulator I think.
Since it is mostly written in C, I can use the Android Native Development Kit (NDK) with the Java Native Interface(JNI)
How to Structure Code
Programming Paradigms
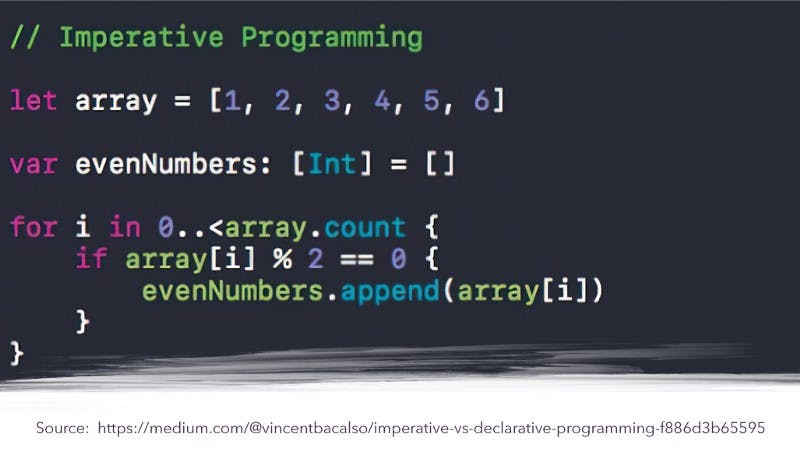
Ok next, the paradigms. Referenced from here.
For the emulator, it is procedure-driven programming. Basically, it runs a normal set of instructions from start to end, like shown below
As it runs the code, it then updates the screen, gets input from the buttons etc.
Problem. Android Apps are mainly Event-Driven. This means that code isn’t meant to keep running, and is only run when certain events happen (eg. when a button is pressed).
Solution: We can use Java threads. A thread is basically a piece of code that keeps running in the background. Start a thread when the App is first opened, and this thread then continuously check the state of a variable.
private Thread emuThread;
public void start(){
    //callError("hi");
    if (emuThread == null){
        emuThread = new Thread(){
            public void run(){
                nativeInit(getRomBytes());
            }
        };
        emuThread.start();
    }
}
public native void nativeInit(byte\[\] rom);

When a button is pressed, we can modify a variable which is then referenced by the thread.

Button button = (Button) findViewById(buttonIds\[i\]);
        final int position = i;
        button.setOnTouchListener(new View.OnTouchListener() {
            @Override
            public boolean onTouch(View v, MotionEvent event) {
                switch(event.getAction()) {
                    case MotionEvent.*ACTION\_DOWN*:
                        // PRESSED
                        inputs\[i\] = true;
                        return true; // if you want to handle the touch event
                    case MotionEvent.*ACTION\_UP*:
                        // RELEASED
                        inputs\[i\] = false;
                        return true; // if you want to handle the touch event
                }
                inputs\[i\] = false;
                return false;
            }
        });
Code Execution in Android NDK and JNI
How JNI works and how it is coded is above the scope of this article. But in short
- Java Code can call Native Functions (which are exported to Java):
- Native Functions can call Java Objects
Keep in mind that every time Java calls Native Code, the Native variables are reset I think. I’m not too sure. For native data to persist, it has to keep running in the thread.
For Native Functions to Call Java Object Methods, they are either:
- Native Functions exported to Java, which have the Java Environment Variable & the Object passed into it as the parameter
JNIEXPORT void JNICALL Java_com_uselessness_sonnydroid_Emulator_nativeInit(JNIEnv *env, jobject thiz, jbyteArray array) {...
2. Other Native functions. These need the JavaVM and the reference to the Object initialised as a global variable (in the exported Native Functions)
g_jvm = 0;
(*env)->GetJavaVM(env, &g_jvm);
emulatorObj = (*env)->NewGlobalRef(env, thiz);
and then the Java environment and object can be referenced in other functions
void update_screen(void){
...
JNIEnv* env;
(*g_jvm)->AttachCurrentThread(g_jvm, &env, NULL); // check error etc
jclass clazz = (*env)->FindClass(env, "com/uselessness/sonnydroid/Emulator");
jmethodID mid = (*env)->GetMethodID(env,clazz, "updateScreenView", "([I)V");
if (intJavaArrayScreen == NULL){
    intJavaArrayScreen = (\*env)->NewIntArray(env,ARRAY\_SIZE);
}
(\*env)->SetIntArrayRegion(env, intJavaArrayScreen, 0, ARRAY\_SIZE, vscreen);
(\*env)->CallVoidMethod(env, **emulatorObj**, mid, intJavaArrayScreen);
}
Overall Flow
After some experimentation, I decided on this data flow

Actual Porting
Making the Native Code Usable
The main changes were
- Instead of updating the SDL Screen, the code updates an array, which is then passed into a Java function to update the screen
- The code reads from an input array instead of from SDL key presses
- Removing other unnecessary SDL references
- Adding a native function to import the ROM as a byte array and start the emulator
- Modifying the CMakeList.txt to compile all the emulator code with the native library
The last point is mainly just adding all the source files together luckily for unununium.
Android Interface
- Open a ROM file and read its data as a Byte Array
- Start the Emulator thread (which calls the native function)
- Add functions to be called by the native code to retrieve/modify data
Other things
- In the integer array, the colours are stored as an integer
- You can use a SurfaceView to display the emulator’s screen, and regular buttons to act as the controller
- Take note, whenever you make a Java object in Native code, it stays as a Java Object which takes up memory (and causes a crash). Instead of doing this
void update_screen(void){
....
intJavaArrayScreen = (\*env)->NewIntArray(env,ARRAY\_SIZE);
}
(\*env)->SetIntArrayRegion(env, intJavaArrayScreen, 0, ARRAY\_SIZE, vscreen);
(\*env)->CallVoidMethod(env, emulatorObj, mid, intJavaArrayScreen);
}
Just use one Java Array and do this
void update_screen(void){
....
if (intJavaArrayScreen == NULL){
    intJavaArrayScreen = (\*env)->NewIntArray(env,ARRAY\_SIZE);
}
(\*env)->SetIntArrayRegion(env, intJavaArrayScreen, 0, ARRAY\_SIZE, vscreen);
(\*env)->CallVoidMethod(env, emulatorObj, mid, intJavaArrayScreen);
}
My Final Result
I finished my Sunplus Emulator App Proof of Concept in about 2 weeks-ish (with work in between and other stuff). It works but there are clearly issues (like audio that I’m too lazy to implement). My source code is here.
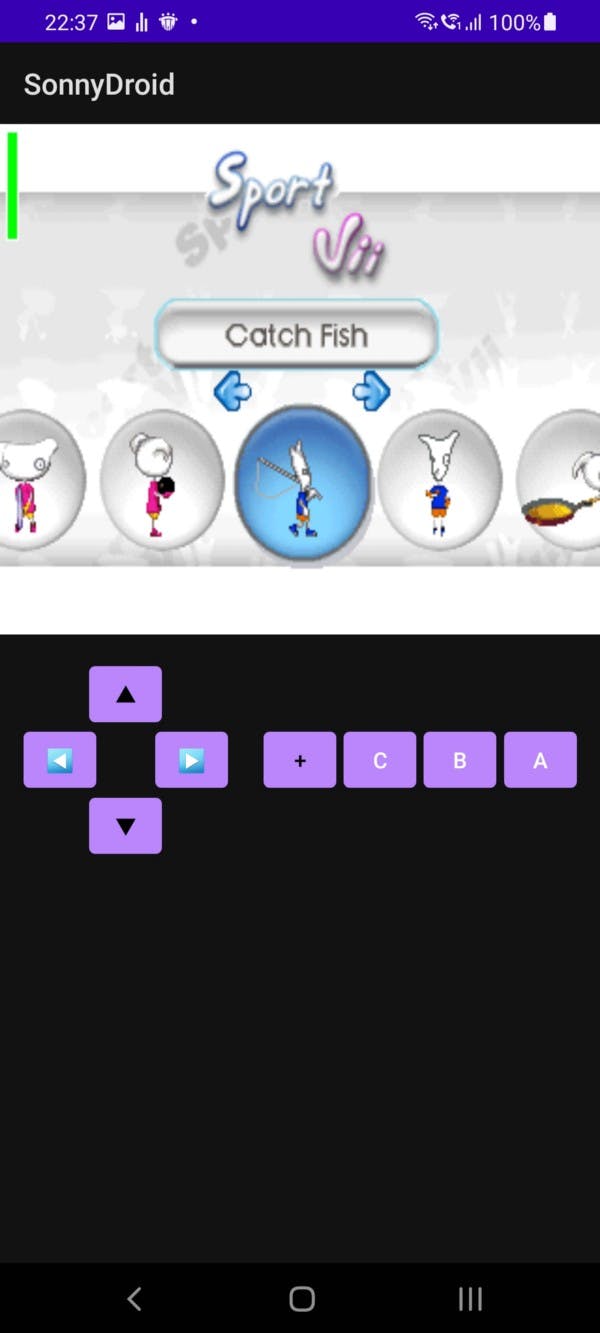
Emulating the Vii
Thanks for reading my ramblings on how I did some porting. Porting an Emulator was a lot harder than I thought