Making a IIDX Controller in 4 hours

I have wanted to get back to making some proper electronics projects in a while. I am also recently addicted to rhythm games, playing way too much osu, and getting into Beatmania IIDX. So I thought, why not combine those 2 and make my own custom controller?
How I got started
I was thinking of making a custom PCB for it, but then I realised it costs $10 on its own?
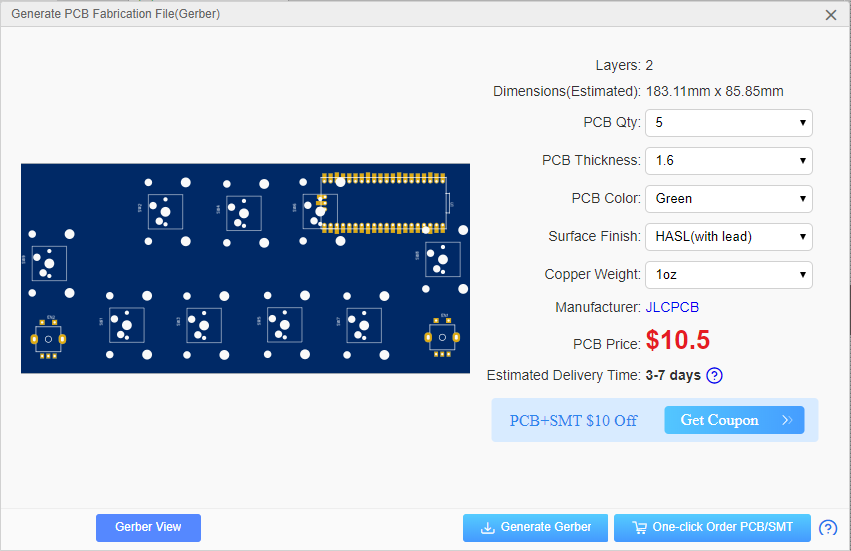
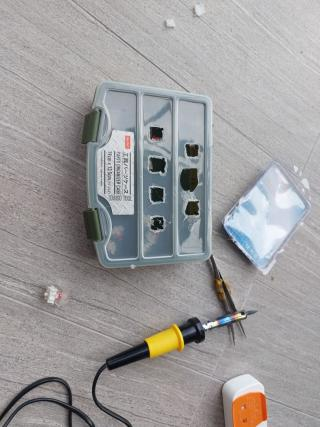
Meanwhile, I found a parts organizer case from DAISO which I bought but never used. All of a sudden, I had a thought, instead of making my own PCB and adding unnecessary cost, I could just make it myself in about 3 hours or so. and so I did
1. Components
| Component | Price (SGD) |
| Raspberry Pi Pico | $10 |
| Keycaps | $4 |
| Gateron Red Switches x 10 | $4.20 |
| DAISO Parts Organiser Case | $2 (maybe now $2.14) |
| Wires etc. | $15 x 1% or less usage = $0.15 |
For me, I had all these components lying around waiting to be used.
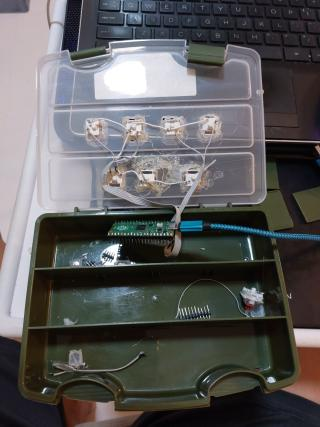
2. Casing
The casing was about the right size. However, I needed to make holes to put the keyswitches.
I initially tried to use a penknife to cut out the hole, but that clearly didn't work so well.
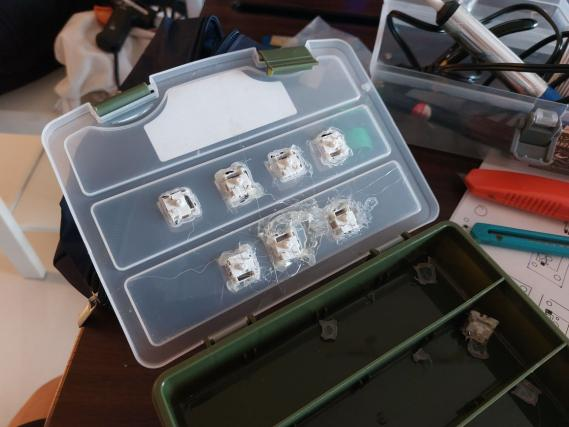
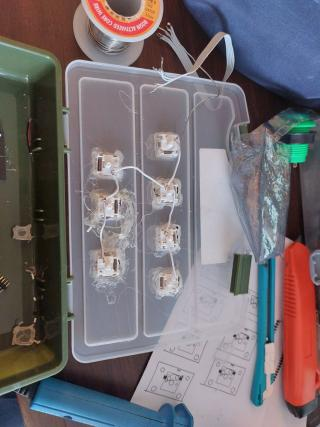
What I eventually did was use a soldering iron to melt the plastic and make holes. I then secured the key switches more firmly using hot glue.
3. Electronics
I connected all the buttons to GND, and to one GPIO pin. Quite Straightforward wiring.
GPIO ______ [ _ - _ ]______ GND
4. Coding
I used the CircuitPython's adafruit_hid library and modified their sample code to be more suitable for a keypad. More info on how to use their library here
My code is as shown below. Make sure to install the library on the board first. I added an osu mode last minute which can be accessed by holding down the 1st button on connecting it.
# SPDX-FileCopyrightText: 2018 Kattni Rembor for Adafruit Industries
#
# SPDX-License-Identifier: MIT

"""CircuitPython Essentials HID Keyboard example"""
import time

import board
import digitalio
import usb_hid
from adafruit_hid.keyboard import Keyboard
from adafruit_hid.keyboard_layout_us import KeyboardLayoutUS
from adafruit_hid.keycode import Keycode

# A simple neat keyboard demo in CircuitPython

# The pins we'll use, each will have an internal pullup
keypress_pins = [board.GP0, board.GP1, board.GP2, board.GP3, board.GP4, board.GP5, board.GP6, board.GP7]
key_pin_array = [] # Our array of key objects
keys_pressed = [Keycode.F, Keycode.T, Keycode.G, Keycode.Y, Keycode.H, Keycode.U, Keycode.J, Keycode.A]
key_prev_val = []

# The keyboard object!
time.sleep(1)  # Sleep for a bit to avoid a race condition on some systems
keyboard = Keyboard(usb_hid.devices)
keyboard_layout = KeyboardLayoutUS(keyboard)  # We're in the US :)

# Make all pin objects inputs with pullups
for pin in keypress_pins:
    key_pin = digitalio.DigitalInOut(pin)
    key_pin.direction = digitalio.Direction.INPUT
    key_pin.pull = digitalio.Pull.UP
    key_pin_array.append(key_pin)
    key_prev_val.append(True) # Pullup not pressed state is high

# osu mode
if not key_pin_array[0].value:
    keys_pressed = [Keycode.F, Keycode.Z, Keycode.SPACE, Keycode.X, Keycode.H, Keycode.U, Keycode.J, Keycode.ESCAPE]

# For most CircuitPython boards:
led = digitalio.DigitalInOut(board.LED)
# For QT Py M0:
# led = digitalio.DigitalInOut(board.SCK)
led.direction = digitalio.Direction.OUTPUT

print("Waiting for key pin...")

while True:
    # Check each pin
    for i in range(len(key_pin_array)):
        if key_pin_array[i].value == key_prev_val[i]:
            continue
        key = keys_pressed[i]  # Get the corresponding Keycode or string
        if key_pin_array[i].value: # Not Pressed
            keyboard.release(key)
        else: # Is it grounded?
            keyboard.press(key)
        key_prev_val[i] = key_pin_array[i].value
    time.sleep(0.01)
5. Overall
Time Breakdown
| Activity | Time Taken |
| Modifying Case & Installing Switches | 1h |
| Soldering | 1h |
| Programming | 1h |
This was a short, simple and yet fun project. Playing BMS on it is much more fun than on my cramped keyboard.
Playing osu with it is also much nicer. It is relatively stable and is not as likely to shift around. The additional buttons can also be used to quickly skip the waiting sections of the beatmaps/ retry.
I can even use it to store parts as intended!
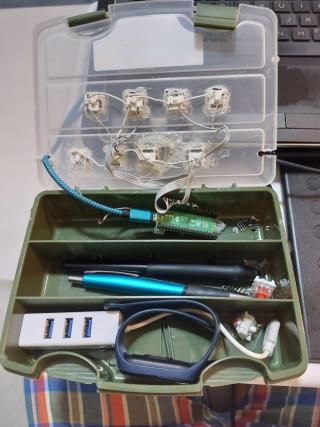
Overall, a fun project for my off day before I get back to work


